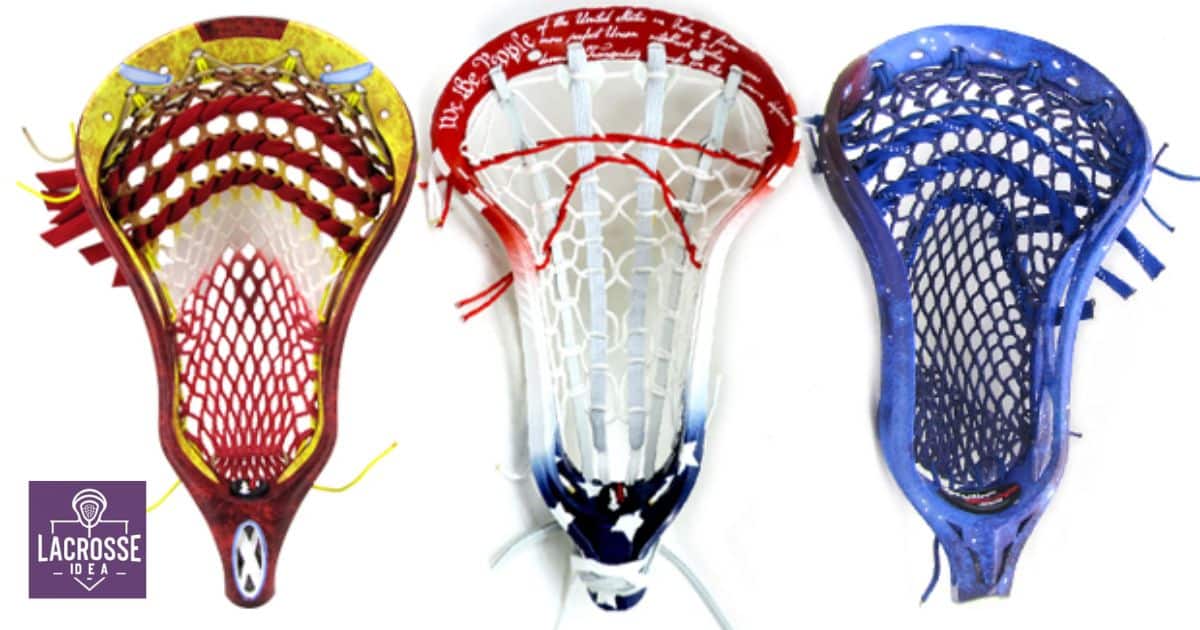
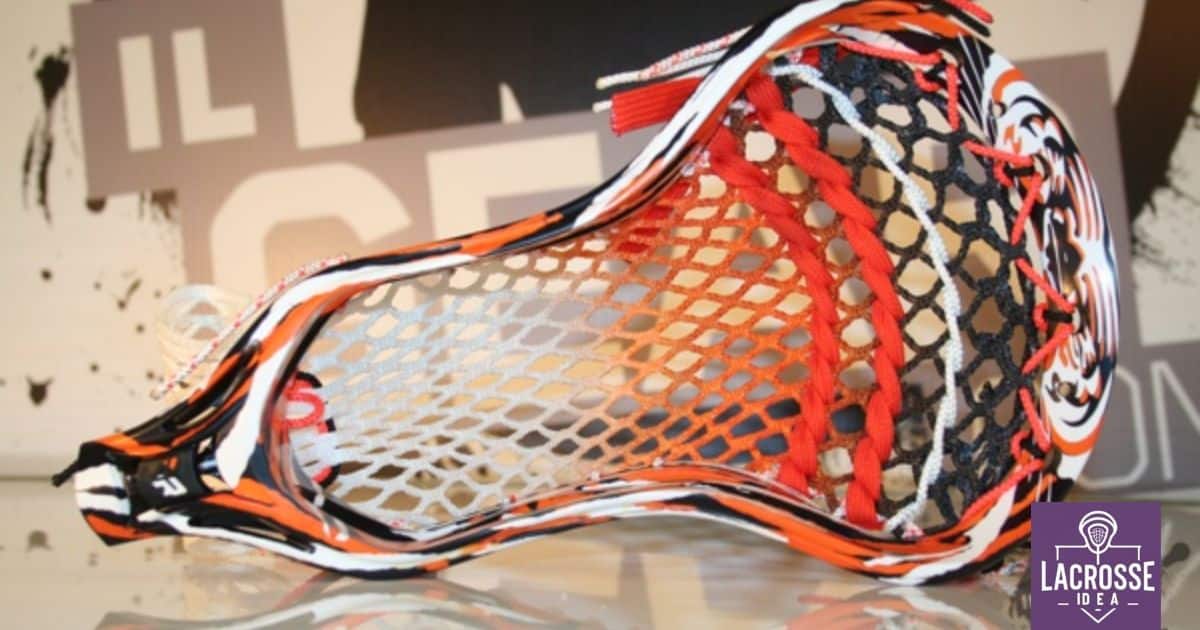
As the sun sets on the lacrosse field, players clad in vibrant, custom-colored lacrosse heads stand poised, ready to take on their opponents. Choosing the right dye for your lacrosse head is crucial in achieving this striking look that sets you apart from the rest. In this article, we will explore the various types of dyes available, factors to consider when selecting a dye, and popular brands that will help you create a lacrosse head that exudes both style and belonging.
Key Takeaways
- Fabric dye, acrylic paint, and spray dyes are the main types of dyes used for lacrosse heads, each offering different benefits and effects.
- When selecting a dye, factors to consider include material compatibility, color and design options, longevity, and ease of application.
- Popular brands of lacrosse dyes include RIT Dye, Angelus Leather Dye, and Jacquard iDye Poly, each offering unique features and benefits.
- The step-by-step guide to dyeing a lacrosse head includes preparing the head, mixing the dye, applying the dye, and allowing it to dry completely.
Types Of Dyes For Lacrosse Heads
There are several types of dyes that can be used to customize a lacrosse head. When it comes to personalizing your lacrosse head, the type of dye you choose can make all the difference. One popular option is fabric dye, which allows for vibrant and long-lasting color. Fabric dyes are available in a wide range of colors, giving players the opportunity to create unique designs that reflect their personality and style.
Another type of dye commonly used is acrylic paint, which provides a more opaque and textured finish. Acrylic paint can be layered and blended to achieve intricate designs and patterns. Additionally, some players opt for spray dyes, which offer a quick and easy way to add color to their lacrosse head. These dyes come in aerosol cans and allow for a smooth and even application. Ultimately, the choice of dye depends on the individual’s preferences and desired outcome.
Factors To Consider When Selecting A Dye
When selecting a dye for your lacrosse head, it is important to consider several factors that will contribute to the overall outcome and durability of the customization. The first factor to consider is the type of material your lacrosse head is made of. Different dyes work better on certain materials, so it is crucial to choose a dye that is compatible with your lacrosse head. Another important factor is the desired color and design.
Some dyes may offer a wider range of colors or allow for more intricate designs, while others may be limited in their options. Additionally, it is important to consider the longevity of the dye. Will it fade over time or resist wear and tear? Lastly, consider the ease of application. Some dyes may require more skill or time to apply, while others offer a simpler application process. By considering these factors, you can ensure that the dye you choose will result in a customized lacrosse head that meets your desired outcome and durability.
Popular Brands Of Lacrosse Dyes
One of the most popular brands of lacrosse dyes is known for its high-quality and wide range of color options. This brand offers a variety of vibrant and long-lasting dyes that allow lacrosse players to personalize their heads and make a statement on the field. Here are three popular brands of lacrosse dyes that are favored by players:
- RIT Dye: RIT Dye is a trusted brand among lacrosse players, known for its easy application process and vibrant colors. It offers a wide range of color options, allowing players to find the perfect shade to match their team colors or express their individual style.
- Angelus Leather Dye: Angelus Leather Dye is popular for its durability and ability to adhere to lacrosse heads made of synthetic materials. It provides a smooth and even color finish, ensuring a professional look.
- Jacquard iDye Poly: Jacquard iDye Poly is a favorite among lacrosse players due to its compatibility with synthetic materials commonly used in lacrosse heads. It offers a variety of intense and fade-resistant colors, giving players the freedom to create unique and eye-catching designs.
With a range of quality brands to choose from, lacrosse players have an array of options to customize their heads to their liking. Now, let’s move on to a step-by-step guide to dyeing your lacrosse head.
Step-By-Step Guide To Dyeing Your Lacrosse Head
Continuing from the discussion on popular brands of lacrosse dyes, a step-by-step guide to dyeing your lacrosse head will now be provided. Dyeing your lacrosse head is a great way to personalize your gear and showcase your individual style on the field. To help you through the process, here is a simple guide:
| Step | Instructions | Tips |
|---|---|---|
| 1 | Prepare the head | Remove any existing dye or paint, clean the head thoroughly, and dry it completely before starting. |
| 2 | Mix the dye | Follow the instructions provided by the dye manufacturer to mix the dye solution. Make sure to wear gloves and protect your work area. |
| 3 | Apply the dye | Use a brush or sponge to apply the dye evenly onto the lacrosse head. Start with a light layer and gradually build up the color as desired. |
| 4 | Let it dry | Allow the dye to dry completely before handling or using the lacrosse head. This may take a few hours or overnight, depending on the dye and environmental conditions. |
Preparing The Lacrosse Head For Dyeing
To begin the process of dyeing your lacrosse head, it is essential to properly prepare the head by removing any existing dye or paint, thoroughly cleaning it, and ensuring it is completely dry. Here are three important steps to prepare your lacrosse head for dyeing:
- Remove existing dye or paint: Use a lacrosse-specific dye remover or acetone to remove any previous dye or paint from the head. Apply the remover or acetone to a cloth or sponge and gently rub the surface until the dye or paint is completely removed.
- Thoroughly clean the head: Use warm water and mild soap to clean the lacrosse head. Scrub it gently with a soft brush to remove any dirt or debris. Rinse it thoroughly to ensure all soap residue is removed.
- Ensure it is completely dry: After cleaning, allow the lacrosse head to air dry completely. Avoid using heat sources like hair dryers, as they can warp or damage the head.
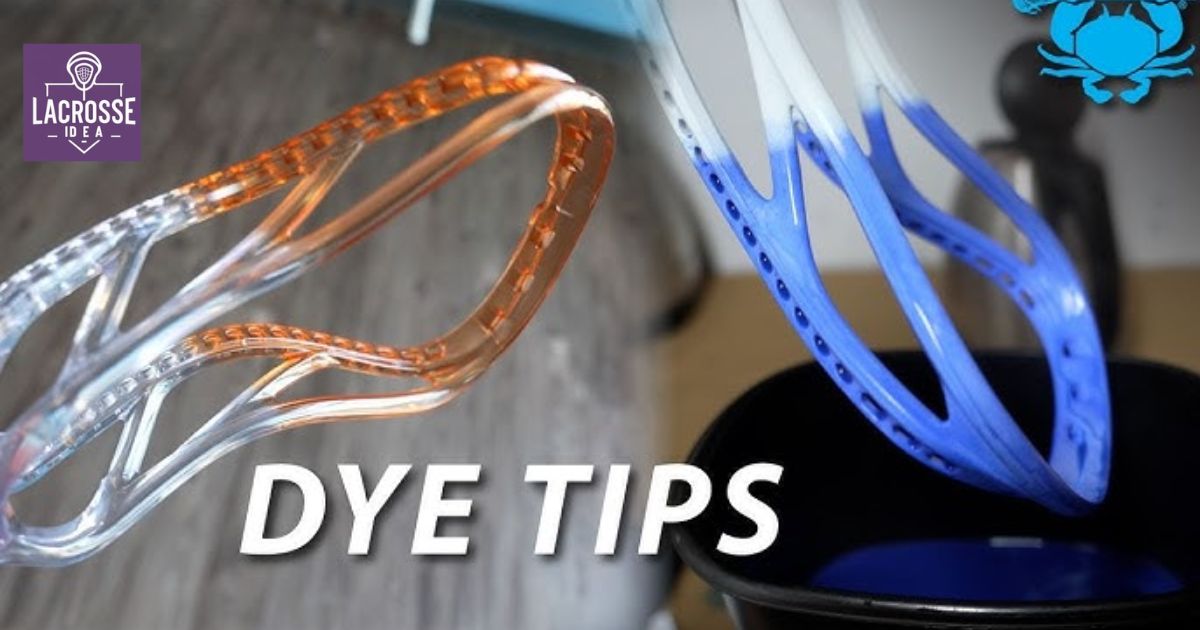
Creating A Marbling Effect With Dye
After properly preparing the lacrosse head, the next step is to achieve a marbling effect with dye. Creating a marbling effect adds a unique and eye-catching design to the lacrosse head, making it stand out on the field. To achieve this effect, begin by selecting two or more dye colors that complement each other. Mix the dyes in separate containers according to the manufacturer’s instructions.
Next, pour the dyes onto the lacrosse head in a random pattern. Use a toothpick or a small brush to swirl the colors together, creating a marbled effect. Be careful not to overmix, as this can result in a muddy appearance. Allow the dye to set according to the manufacturer’s instructions, and then rinse off any excess dye. The result will be a stunning marbled design that adds a touch of personalization to your lacrosse head.
Adding A Second Color To Your Lacrosse Head
To enhance the design of your lacrosse head, incorporate a second color using a professional dyeing technique. Adding a second color can make your lacrosse head stand out on the field and showcase your personal style. Here are three ways to effectively add a second color to your lacrosse head:
- Gradual fade: Create a smooth transition between the two colors by blending them together. Start with the primary color at the top of the head and gradually introduce the second color towards the bottom.
- Bold contrast: If you want a more eye-catching design, choose two contrasting colors. This will create a striking visual effect and make your lacrosse head instantly noticeable.
- Accent details: Use the second color to highlight certain areas or add intricate details. This can include the sidewalls, throat, or specific patterns that you want to emphasize.
Expert Tips For Achieving The Best Results
To ensure optimal results when dyeing your lacrosse head, it is essential to follow these expert tips for achieving the best outcome. Firstly, thoroughly clean your lacrosse head before dyeing to remove any dirt or oils that may interfere with the dye’s absorption. Use a mild detergent and warm water, gently scrubbing the surface with a soft brush. Next, wear gloves to protect your hands from staining and ensure even application of the dye.
Shake the dye bottle well before applying, and consider using a spray bottle for more precise control. Apply multiple thin coats of dye, allowing each coat to dry before applying the next. Lastly, seal the dye with a clear lacquer or sealant to protect the color and enhance durability. By following these expert tips, you can achieve the best results and enjoy a vibrant, long-lasting lacrosse head.
Soaking The Head In A Dye Bath
To achieve a deep and even color, one effective method for dyeing a lacrosse head is by soaking it in a dye bath. This process allows the dye to penetrate the material thoroughly, resulting in a vibrant and long-lasting color. Here are three key steps to follow when soaking the head in a dye bath:
- Prepare the dye bath: Start by choosing a dye that is suitable for the material of your lacrosse head. Follow the instructions provided by the dye manufacturer to create a dye bath of the appropriate concentration.
- Submerge the head: Carefully place the lacrosse head into the dye bath, ensuring that it is completely submerged. Use a stirring tool to gently move the head around in the bath, promoting even dye absorption.
- Monitor and rinse: Keep an eye on the head as it soaks to achieve the desired color intensity. Once the desired color is achieved, remove the head from the dye bath and rinse it thoroughly with cold water to remove any excess dye.
Safety Precautions When Working With Dyes
When working with dyes for dyeing a lacrosse head, it is important to prioritize safety by following proper precautions. Handling dyes requires caution to avoid any potential harm or accidents. Here are some safety measures to consider:
| Safety Precautions | Description |
|---|---|
| Wear protective gloves | Use gloves made of latex or nitrile to protect your hands from direct contact with the dye, preventing any skin irritation or staining. |
| Work in a well-ventilated area | Ensure proper ventilation to avoid inhaling any harmful fumes that may be released during the dyeing process. Open windows or doors or use a ventilation fan to maintain air circulation. |
| Clean up spills immediately | Accidental spills can happen, so it is essential to clean them up promptly to prevent slips or further staining of surfaces. Use absorbent materials like paper towels or rags to soak up the spilled dye. |
Removing Dye Stains From Your Lacrosse Head
One effective way to address dye stains on your lacrosse head is by regularly and diligently cleaning it. By following these steps, you can successfully remove dye stains and keep your lacrosse head looking fresh and vibrant:
- Use a mild detergent: Start by mixing a small amount of mild detergent with warm water. Gently scrub the stained areas using a soft cloth or sponge. Avoid using harsh chemicals or abrasive materials that can damage the lacrosse head.
- Rinse thoroughly: After cleaning, rinse the lacrosse head with clean water to remove any remaining detergent residue. Make sure to rinse it properly to prevent any potential skin irritation during gameplay.
- Dry properly: Once the lacrosse head is clean, allow it to air dry naturally. Avoid using heat sources such as hair dryers, as they can cause the material to warp or melt.
Exploring Unique Dyeing Techniques
Exploring innovative dyeing techniques can elevate the appearance of your lacrosse head. By experimenting with different methods, you can create unique and eye-catching designs that reflect your personal style and make your lacrosse head stand out on the field. Here are five exciting dyeing techniques that you can try:
| Technique | Description |
|---|---|
| Marbling | Create intricate patterns by floating dye on the surface of water and transferring it onto your lacrosse head. |
| Tie-Dye | Use rubber bands to create different patterns and designs by selectively dyeing sections of the head. |
| Ombre | Achieve a gradient effect by gradually transitioning colors from light to dark or vice versa. |
| Stenciling | Use stencils to create precise designs and shapes on your lacrosse head. |
| Dip-Dye | Immerse your lacrosse head partially in dye to achieve a striking two-tone effect. |
These techniques offer endless possibilities for customization, allowing you to express your individuality and showcase your creativity on the lacrosse field.
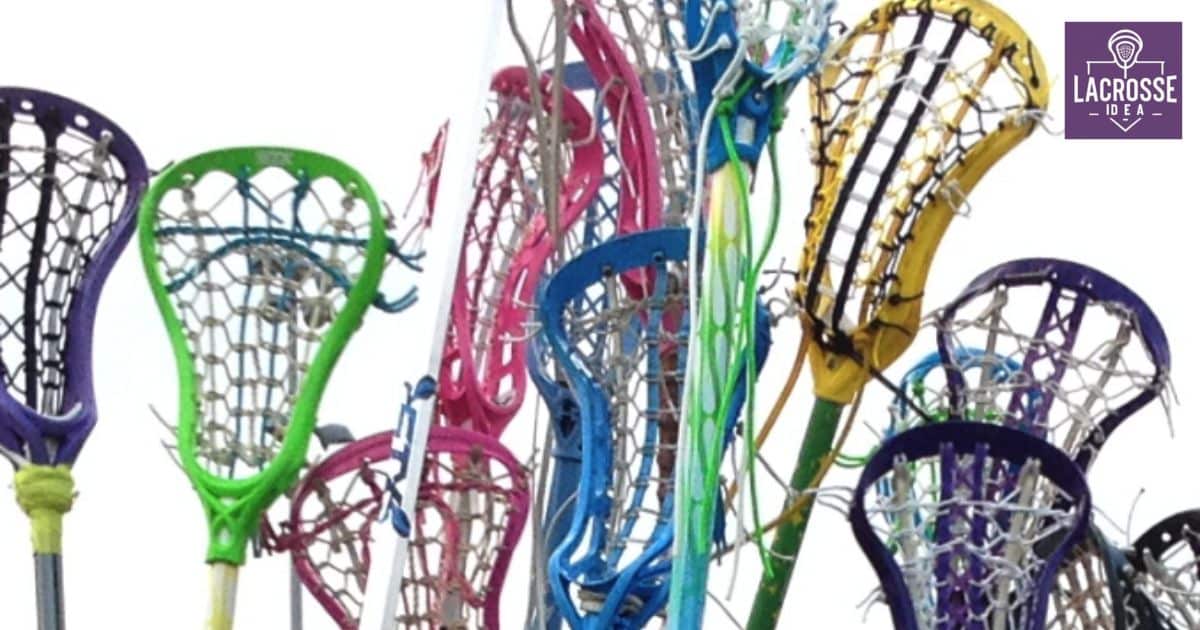
Showcasing Creative Lacrosse Head Dye Designs
To effectively showcase creative lacrosse head dye designs, it is essential to regularly experiment with different techniques and color combinations. Here are three key ways to create eye-catching designs that will make you stand out on the field:
- Layering: Experiment with layering different colors to create depth and dimension in your design. By applying multiple layers of dye, you can achieve a unique and vibrant look that will catch everyone’s attention.
- Stenciling: Utilize stencils to add intricate patterns or logos to your lacrosse head. Stenciling allows for precise and detailed designs, giving your stick a professional and personalized touch.
- Fade Effect: Create a fade effect by blending two or more colors together. This technique adds a dynamic and gradient look to your lacrosse head, making it visually striking and visually appealing.
Frequently Asked Questions
Can I Use Regular Fabric Dye for My Lacrosse Head?
Yes, it is possible to use regular fabric dye for your lacrosse head. However, it is important to note that the dye may not adhere as well to the material and may not provide the same level of durability as specialized lacrosse head dye.
How Long Does It Take for the Dye to Fully Set on the Lacrosse Head?
The dye on a lacrosse head typically takes about 24-48 hours to fully set. During this time, it is important to allow the dye to dry completely and avoid any contact or rubbing.
Can I Dye a Lacrosse Head That Already Has a Design or Pattern on It?
Yes, it is possible to dye a lacrosse head that already has a design or pattern on it. However, it is important to note that the existing design may affect the final outcome of the dye.
Are There Any Special Cleaning Instructions for a Dyed Lacrosse Head?
To ensure the longevity and vibrancy of a dyed lacrosse head, it is important to follow specific cleaning instructions. These instructions may include using mild soap, avoiding abrasive materials, and gently wiping the surface to prevent any damage or fading.
Can I Dye Multiple Colors on My Lacrosse Head at Once?
Multiple colors can be dyed on a lacrosse head simultaneously, allowing for creative customization. However, it is important to carefully follow the dyeing instructions and ensure that the colors do not bleed or mix undesirably.
Conclusion
In conclusion, choosing the right dye for your lacrosse head is crucial to achieving the desired aesthetic and personalization. Considering factors such as durability, color intensity, and ease of application is important when selecting a dye. Popular brands offer a wide range of options to suit individual preferences. By following a step-by-step guide and taking necessary safety precautions, you can successfully dye your lacrosse head. Exploring unique dyeing techniques and showcasing creative designs adds a touch of artistry to this beloved sport.